
I’m all about multipurpose. The less things I have in my house that can only do one task, the better. Which is why, when I got a heat press, I ended up going with a many-in-one stand that had different attachments.
However, even if you have a simple clamshell heat press you’ll be able to do today’s tutorial!
Expressions Vinyl is not only great for, well, vinyl… but did you know they sell amazing DecoFoil as well? This heat-reactive foil is great when used with Siser Easyweed Adhesive (I’ve made plenty of foil shirts at this point) but it’s also amazing when paired with plain prints straight from your printer!


If you have a laser printer at home, great! If not, you can still get in on this foil-y goodness. Just bring your printable file to a place like Staples or Office Depot and ask their printing center to print a copy for you. It’s typically really affordable since you’ll only really need black and white prints.

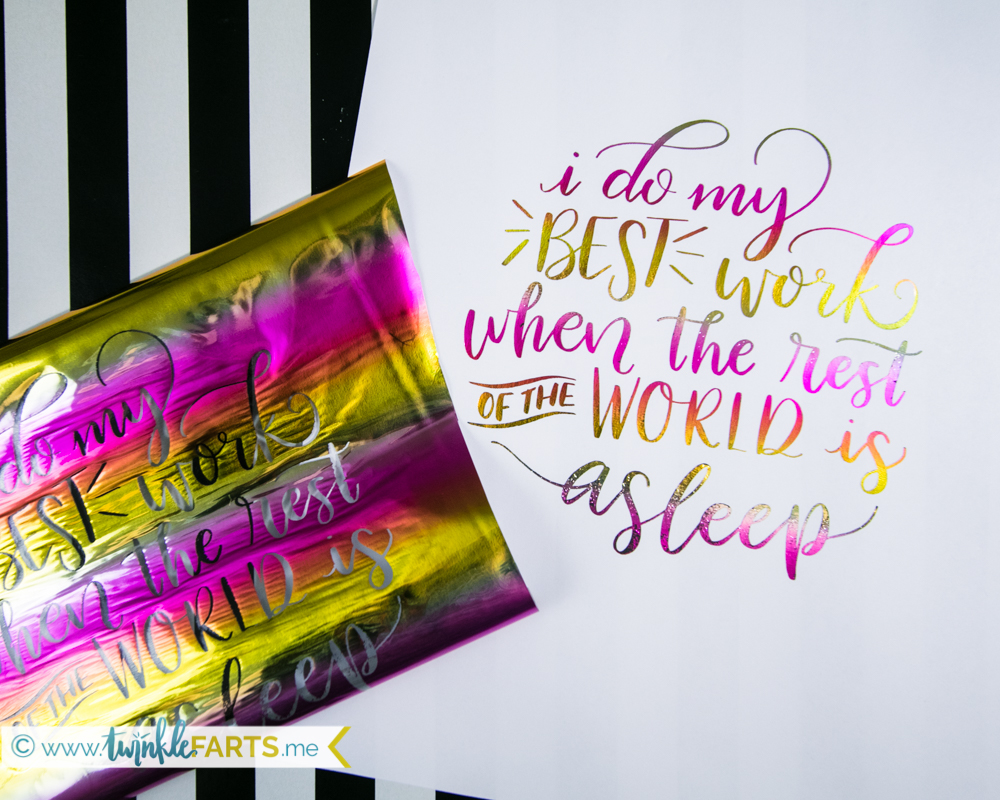
After printing on whatever paper material you want (I suggest a thicker card stock, since it works better with the pressure of your heat press), grab a piece of DecoFoil and lay it over your print. Make sure all the black design is hidden below the foil, and that the pretty side is face up on your sheet.
Using scissors, carefully trim any excess that isn't covering any black toner. This will reduce waste and allow you to get the most out of your foil sheets.


Once you have your layers in place, press with a good amount of pressure on ~285 degrees F for anywhere from 5-10 seconds. You don’t want to burn the paper, but the heat will help the foil react with the toner and “stick” in spots that are printed.
Set your print aside to let it cool for a few seconds and once it’s cool to the touch do my favorite part: peel off the foil layer! You’ll probably gasp when you see the beauty underneath. I know I do.

Prints with foiling are great for dorm room décor if you or someone you love is off to college, or simply used as gift tags for the upcoming holidays. It’s a great way to add a bit of twinkle without a lot of fuss ;)

If you like the design used in this tutorial, you can grab it from my shop! It comes with both a printable .PNG and cut files (just in case you'd prefer to use the EasyWeed Adhesive!)
Don't forget to follow me on Instagram for more crafty posts! Until next time,

At first i was like, is this for real? but after seeing the results i am amazed with pieces of foil lying around i would definitely try this preferably for postcards
ReplyDeleteHelpful post.
ReplyDeleteThanks for this post.Diversity statements are becoming increasingly more important A personal diversity statement has to be clear, no matter why it is being written. This means that the writing style must be understandable with no grammatical errors. We produce a polished copy for our clients. I also share my resource.https://www.writemeanessay.net/essay-writing-services/write-an-essay-online-with-our-team/
ReplyDeleteGreat post
ReplyDeleteMagnetskilte
What heat press do you use?
ReplyDeleteWow, cool post. I'd like to write like this too - taking time and real hard work to make a great article... but I put things off too much and never seem to get started. Thanks though. Warmtepompen
ReplyDelete